Showing posts with label Recipes. Show all posts

Tuesday, April 8, 2014

Spicy Sausage Pasta Dinner--One Pot!

Are you all in for a treat today or what? I have a tasty and EASY yummy one pot pasta dish today on the blog! This has been approved by Shaun and my parents, so you know it's a winner! Plus the best part is that it only uses one pan. Who doesn't like not having that many dishes to clean up?  Though I am all for the philosophy of if you cook dinner, then someone else should be in charge of the dishes. Who is with me on that one? 

This recipe is adapted from  http://iowagirleats.com/2013/03/03/spicy-sausage-pasta-skillet/

 Spicy Sausage Pasta Dinner

Ingredients:
Nonstick cooking spray
12oz Smoked Turkey Sausage slicked (this is the precooked sausage that comes in a horseshoe shape)
2 large shallots, finely chopped
2 garlic cloves, minced
2  1/2 cups chicken broth
1 can 10oz Rotel (I used original but you can use mild or even hot, depending on your taste buds)
1/2 cup skim milk
8oz cut pasta ( I used whole wheat mini penne, but you can use whatever is your personal favorite)
1-6oz package baby spinach
Parmesan Cheese to sprinkle on top

Directions:
1. Spray a large skillet with nonstick cooking spray. I used a deep 14 inch skillet and that worked out perfectly for this meal. Heat the spray over medium-high heat. Add sausage and shallots then saute until sausage is slightly curled, about 5 minutes Add garlic then cook for 30 more seconds, stirring constantly
2. Turn heat up to high then add chicken broth, tomatoes and milk. Bring to a boil then add pasta and stir to combine. Place a lid on top then simmer for 10 minutes, or until pasta is al dente, stirring once or twice. Add spinach then stir to combine and cook until wilted, about 3 minutes. Sprinkle with Parmesan cheese, if desired!


Like, I said, it is all made in one pot! I love that! I also served a salad with this, and called it a night! There is some dished up on my plate, below sprinkled with Parmesan cheese. I would highly recommend adding Parmesan cheese!


Try this out next time you need an easy, quick, but YUMMY dish for dinner! Enjoy! 

Hugs, 

Caroline

Friday, April 4, 2014

Healthier(ish) Banana Bread

Happy Friday!!! Who has big plans for the weekend? Hopefully you have something fun planned, and if not make plans now! It's not too late! And if you have some bananas that are getting past their prime, do I have a recipe for you!

So who has ever bought with the best intentions a big ole bunch of bananas, with the intent to eat one every day, but before you know it, the week has slipped away and you still have a few bananas left that are starting to get to the point where you may not want to eat them? Raise your hands, I know you are out there, we have all been there. You might also be thinking that you bought the bananas to be healthy in the first place so you don't want to undo all the healthiness you had intended, right? Where this is where this recipe comes in. It is my take on a healthier(ish) banana bread.


Instead of using traditional sugar, or peanut butter (yes this Banana Bread has Peanut Butter in it, yum!) I use Splenda and Better n' Peanut Butter. 


This Better n' Peanut Butter has 85% less fat than regular peanut butter, and less sodium. I can buy it at my local Trader Joe's. I am not sure where else it is sold at, but you can really use any type of peanut butter. 


Instead of using traditional white sugar, I used Splenda. For those of you who are unfamiliar with Splenda, it is a no calorie sugar substitute. For those of you like me, who are trying to watch their sugar intake, I find this to be a great substitute. I promise if you didn't know it had been used, you would think that it was made with real sugar. I promise! These two ingredients are my two substitutes to help make this banana bread a little bit healthier than your typical banana bread recipe. 

Recipe:

Ingredients: 
  •  1/3 cup butter
  • 1 cup sugar
  • 2 eggs
  • 1 t salt
  • 1/2 t baking soda
  • 2 t baking powder
  •  1/4 cup peanut butter
  • 1/4 cup water
  • 1 2/3 cups flour
  •  3 very ripe bananas mashed up
  • 1/2 cup semi-sweet mini chocolate chips
 Directions:
  1. Preheat oven to 350 degrees
  2. Soften butter and mix together with sugar
  3. Add eggs, salt, baking soda baking powder, peanut butter, and water. Mix together.
  4. Add flour and mix together.
  5. Add the mashed bananas and thoroughly mix together. 
  6. Add the chocolate chips and mix
  7. Pour into three mini loaf pans
  8. Bake between 40-45 minutes, or until a toothpick is inserted and comes out clean


Oh yes, I forgot to mention that there are mini chocolate chips in the loaves! It just adds that certain something, (because come on, everything is better with chocolate) and the peanut butter flavor is very subtle.I ended up cooking my three mini loaves for 40 minutes so you may want to check on your loaves after 35 minutes.


Have a great weekend everyone and don't let those almost bad bananas go to waste! 

Hugs, 

Caroline

Wednesday, March 26, 2014

Recipe--Quick and Easy Quiche

Good Afternoon!!! I hope it is as sunny as it is here, wherever you may be reading! The sun is shining and that always puts me in a better mood. You know what also puts me in a good mood...cooking! I do love to cook, and today I have a fabulous and yummy recipe for you all to try, plus it is SUPER EASY! 

For any of my readers out there who don't know this, I currently reside with my parents while my husband is deployed, and one of the upsides of that, (there are many actually, shocking to some but I do love my parents!) is my mom gets a lot of magazines! The other day her Taste of Home magazine came in the mail and I saw a recipe for an amazingly simple but yummy sounding quiche. The best part is that it only had three ingredients!  Sign me up!  I love quick, easy and short ingredient lists. 


I did change it up a bit and added one extra ingredient, but I think you all can handle four ingredients! 

Ingredients: 
1-Pilsbury Pie Crust 
1- Bunch of  Fresh Asparagus
1-16oz container of Egg Beaters Southewestern Style
1-Cup of Mozzarella Cheese (this was my addition)

Instructions:
1.Preheat the oven to 350 degrees.
2. Place the pre-made pie crust in a regular sized 9in pie plate.
3. Chop up the fresh asparagus and place in the dish.
4. Pour the carton of Egg Beaters over the aspargus. 
5. Sprinkle  the cheese on top.
6. Place in the preheated oven for 45 minutes or until your quiche is set. 


Seriously, how easy is that? In fact it was so easy to make, that I made it this morning before heading off to the gym. It was great to have a nice filling breakfast before my Turbokick class. The great thing about quiche is that you can serve it anytime. It is great for breakfast, brunch, lunch or even a light dinner!  If you love quiche, or if you are even curious about quiche try this very easy, but extremely yummy recipe out. You will thank me! :)


 Original Recipe Source:

Hugs, 

Caroline


Tuesday, March 25, 2014

Tasty Tuesday: Recipe--Easter Candy Bark

Right now as I look outside my window, I see the dreaded white stuff coming down. Yes, snow! At the end of March in Virginia! You would think I was still living in upstate New York, the way the weather is here today. It is not a lot of snow, but still I just want it to be Spring already, and for the weather to warm up. What does a girl have to do around here for some warmer weather?

Well since Spring and Easter are almost upon us, I decided to go ahead and make some Springtime treats. I mean if it can't feel like Spring outside, at least I can pretend it is Springlike inside, right? I actually made this to send to my hubby in Afghanistan, and since it takes a while to get there, I wanted to make sure that it arrived in time for Easter! The cast of characters:


Easter  Candy Bark:
1 bag of Pretzels (any shape, but I would recommend the snaps or sticks, and I used about 3 handfuls gently crushed up) 
1 package Spring Oreo's (I used 12 from the package, and you will crush them gently)
2 packages white chocolate candy melts (I used 2-12oz packages, and bought mine at the local craft store
1 package M&M's-your favorite flavor (I used peanut M&M's and got the spring color M&M's to go with the theme)
Rainbow Sprinkles
Wax Paper 
Cookie Sheet


I love rainbow sprinkles!!! Seriously, though this little package of rainbow sprinkles moved withe me, all the way from upstate New York to Virginia. I just couldn't bear with leaving them behind or giving them away. Maybe that is one reason I was drawn to make this recipe is my deep-rooted love for anything and everything to do with rainbow sprinkles. 

Luckily for Shaun, he found out my love for rainbow sprinkles early on in our relationship. One night down in Virginia Beach, after I had a few too many Rum and Diet's, (this was also the first time he ever had seem me imbibe a bit too much!) we were walking on the Boardwalk, and Shaun suggested we grab some soft serve Ice Cream. I, of course got overly excited when I saw that you could get your ice cream dipped in...you guessed it, RAINBOW sprinkles! Shaun  will still talk to this day about that evening, and how I go so excited and scared the poor ice cream man with my love for a rainbow sprinkle dipped ice cream cone. I am sure I was not the first, nor his last overly excitable guest! 

Any who, I digress!  Back to the Easter Candy Bark. You want to grab a cookie sheet, and tear off a piece of wax paper, and place it on your cookie sheet. Then gently crush up your 3 handfuls of pretzels and 12 oreos, and place on the wax paper. 


Look how pretty that looks! Next you want to melt your white chocolate because you will be pouring it over the Oreo/pretzel mixture. I just followed the melting instructions on the back of the packages of the white chocolate for the microwave. It was easy, and I had the chocolate melted in no time.  Then you want to pour/spoon the melted white chocolate over the Oreo/pretzel mixture, and while it is still warm, add your M&M's and sprinkles, so they can set into the bark. Then you will want to chill the bark in the fridge for at least an hour, so it can get nice and hard. After an hour, you can break it up into pieces to enjoy!


Now doesn't that look yummy and festive for Spring and Easter? And, yes I may have gone a little bit overboard with my use of sprinkles, but I do love me some sprinkles!  This would be a fun treat to make for your Easter celebration or for any Spring time function, because the colors make it feel oh so Springy! 

The original recipe can be found here:

I did sample a few pieces before packaging it up to send, and it is very sweet! So for all you sweet lovers out there, give this a try, and just make sure to break into bite-size pieces because you don't need a lot of it for your sweet-tooth!  This is also a very easy recipe to make, and can be adjusted to your liking!


Does anyone else have any yummy Springtime favorite treats? 

Hugs,

Caroline


Friday, March 21, 2014

Insanity Muffins!

Alright so the post title might be a little bit misleading, but I promise that this post does include a very tasty recipe for muffins (tried and tested by yours truly!) but first a little bit about insanity...


Have any of you all ever tried or done the Insanity Workouts? I did my second one today at the gym, and let me tell you, it is insane! For those of you who are unfamiliar with the Insanity exercise program, you work out for 3-5 minutes, then have a very short break, and then get right back into working out. It is technically interval training, and during the  45 minutes of the program your body is constantly working, well except during the short breaks (my favorite part, hehe!)  I have to say, it is a great workout, but man oh man., do you feel it later. I am already feeling it, and I know I will be sore tomorrow. 

Now onto the good stuff...Muffins! Now raise your hand if you are like me and love Pinterest? I might spend way too much time on that website, planning my future dream house, and outfits for kids I don't have.  But the one good thing about my obsession is the awesome recipes that I have found on Pinterest. I actually even have a board that I do pin recipes that I have made, and so far have made about 60 different recipes. Not too shabby, especially when they have awesome results like these little babies! 


I came across this recipe for Flourless Peanut Butter Chocolate Chip Blender Muffins, and I knew I had to try them out. It claimed that they were easy, didn't have that many ingredients, and all you had to do was put them all in your blender. And bake them of course.  Plus they were under 100 calories per muffins! I was sold! 


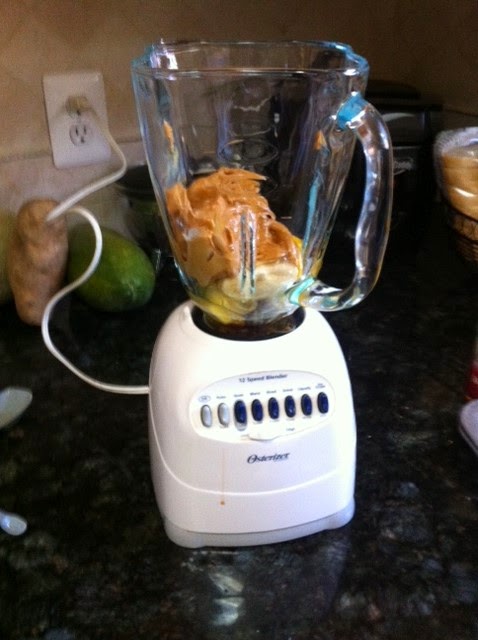
All the ingredients in the blender! Well except the mini chocolate chips, if you put them in the blender they would have gotten all chopped up, and you don't want that! I just added those after everything was blended.
 
All blended up! 

The recipe makes 17 mini muffins and I got exactly 17 muffins, using about 1 tablespoon of batter per mini muffin cup.  I baked mine for 9 minutes and they were perfect! Here is a link to the original recipe:

http://www.averiecooks.com/2013/10/flourless-peanut-butter-chocolate-chip-mini-blender-muffins.html

Have I mentioned that there is no flour, and only 3 tablespoons of honey in the entire recipe! No other sugar is added, and all under 100 calories per muffin. What is there not to love about these little mini muffins! 


Go ahead and make these sweet little treats this weekend, and don't feel guilty about it!

Hugs, 

Caroline